How To Setup Cricut EasyPress Mini Machine?
- Posted by:Mathew Jones
- Tags:Setup Cricut EasyPress Mini Machine, Cricut EasyPress Mini Machine, Cricut EasyPress Mini, Cricut Machine
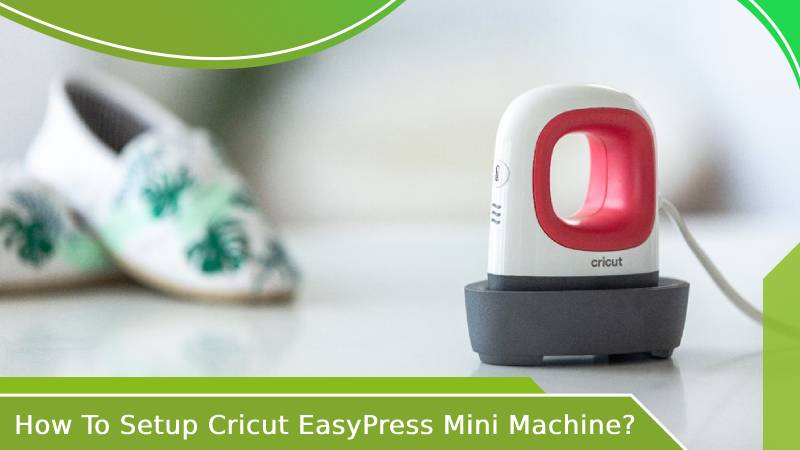
Cricut EasyPress Mini machine is suitable for small projects that you won't be able to do using the traditional EasyPress. But, to begin with the project, you must know how to set it up the right way. If you are a novice Cricut machine user, this is a must-read blog. Here, you will learn the proper steps to set up the Cricut mini machine for iron-on projects and infusible inks. You will also get an idea of some essential points you must keep in mind before starting the setup process. Follow the below-mentioned steps in the write-up to set up the machine and start your project.
General Set Up Of Cricut Easy Press Mini Machine
Step 1: Unboxing Cricut EasyPress Mini
You will find the following items when you will unbox your Cricut EasyPress Mini:
- Cricut EasyPress Mini machine
- Welcome Card
- Safety Base
- Instruction Manual With Time And Temperature Guide
- Sample Practise Materials
Important Points To Keep In Mind:
- Before you start setting up your Cricut Easy Press Mini machine, ensure it is at room temperature.
- Make sure that the base material and all the fabrics are completely dry before using them on your Cricut EasyPress Mini.
- Always keep the mini easy press machine back in its Safety Base when you are not using it.
- Make sure you use a shoe form, hat form, or folded towel aside from the projects with particular objects like shoes, hats, etc. This will create a firm pressing surface while using your mini easy press machine on it.
- Ensure that you move your Cricut Easy Press Mini machine continuously over the design during the transfer while pressing. Cover every area of the design, and run your mini press machine all the way through every intricate detail of your design, including the centre and edges.
- Let the heat plate of your mini press extend approximately thirteen millimetres beyond all the edges of your design that you are pressing.
- The design sizes that you can apply to your material with the Mini press range from the smallest area, which you can reach with your precision tip. The maximum range of the surface area is nearly two times more than the heat plate.
- The recommended settings are suggested keeping in mind the maximum sizes; they are stated below:
- For Iron-On Projects: 4 inches width x 3.5 inches length or 1.7 inches width x 5.25 inches length
- For Infusible Ink: 2.75 inches width x 2.75 inches length or 1.625 inches width x 5 inches length
How To Setup Cricut EasyPress Mini For Iron-on Projects?
NOTE: Make sure that the design that you are pressing is within the maximum recommended design sizes for Cricut Easy Press Mini Iron-on projects which are 4 inches in width x 3.5 inches in length or 1.7 inches in width x 5.25 inches in length.
Step 1: Turn The Power On of Your Cricut EasyPress Mini
- When you are using flat base materials, use a firm, flat and heat-resistant surface around the height reaching upto your waist. Use an Easy Press mat beneath the material to protect the surface from any harm.
- If you use objects with a vacant cavity or hollow spaces in them, like shoes or hats, it is recommended that you use a folded towel or foam inside to create a firm surface for pressing.
- Make sure that your ironing board is stable. Avoid any kind of flimsy surface while pressing.
Step 2: Set The Temperature
- To determine the temperature settings for your project, use the Cricut Heat Guide.
- When you initially turn the machine on with the power button, it is set to Low. You will have to press the power button again to set it at Medium temperature and again press the power button to set the temperature to High.
Step 3: What The Flashing Light Means
- The orange flashing light means that your Cricut Easy Press Mini is heating up.
- The green flashing light means that your Easy Press Mini machine has reached the set temperature.
Step 4: Set A Separate Timer
- The Cricut Easy Press mini does not have a separate button to set the timer. You can use a separate timer, maybe a stopwatch or your mobile phone, to set a timer according to the recommended time for your material. You can refer to the Cricut Heat Guide to check how long you have to press on your material.
Step 5: Preheat Your Base Material
- Press over the application area for the recommended amount of time with your Cricut Easy Press Mini.
Step 6: Position The Design
- Ensure that the shiny side with the clear liner is facing up.
Step 7: Apply Heat On Both Sides
- Start the timer that you have set separately and move your Cricut EasyPress mini machine all over the design continuously till the countdown reaches zero. Make sure that you cover all the areas of the design, including the center and edges. Also, allow the heat plate to extend approximately thirteen millimetres beyond all edges of the design.
- Flip over the base material, and heat the back side of the design for the recommended time.
Step 8: Peel Off The Liner
- To peel off the liner, first, determine the peel temperature from the Cricut Heat Guide, whether it is warm or cool. Then you can gently peel off the clear liner to reveal the finished design.
How To Setup Cricut EasyPress Mini For Infusible Ink?
IMPORTANT: Refer to the Cricut Heat Guide to know the settings and stackings instructions. Keep in mind that the Infusible ink projects have special instructions. The instructions or guide depend on the blank and Infusible Ink product that you are using.
NOTE: Make sure that the design that you are pressing is within the maximum recommended design sizes for Cricut Easy Press Mini Infusible ink projects, which are 2.75 inches in width x 2.75 inches in length or 1.625 inches in width x 5 inches in length.
ITEMS REQUIRED: For this Infusible ink project, you will require the items listed below:
- Cricut Easy Press Mini
- Cricut Easy Press Mat
- Cricut Apparel
- Design made from an infusible ink transfer sheet that you want to use on your project. You can also have your designs created with Infusible Ink Markers or Pens.
- Butcher Paper
- Cardstock Material
- Lint Roller
- Scissors
- Tweezers
- Heat Resistant Tape
Step 1: Turn On Your Cricut EasyPress Mini
- Always make your infusible ink projects using the Cricut Easy Press Mini on a flat, firm, and heat-resistant surface. The surface should have a height that reaches upto your waist. Use the Cricut Easy press mat to protect your surface from burning.
- Use iron boards that are stable and not flimsy. A flimsy and clumsy surface is most likely to smear your infusible ink project.
Step 2: Set The Temperature On Your Cricut EasyPress Mini
- Use the Cricut Heat Guide to know the temperature settings for the infusible ink project.
- When you turn on your Cricut Easy Press Mini, the temperature will set automatically to Low. Press it twice to reach a high-temperature setting.
- The orange light flashing on your Mini Press means that it is heating up. When the light turns green, it means that the Mini Press has reached the set temperature.
Step 3: Set The Timer
Now, set a separate timer for the amount of time required for your infusible ink project. You can know the recommended time from the Cricut Heat Guide.
Step 4: Preheat Your Base Material
Protect the area that is left blank by placing butcher paper on it. Now move the EasyPress Mini machine all over the application area for the recommended time.
Step 5: Prepare To Transfer The Design
- Go to the Cricut Heat Guide and follow the instructions given for stacking mat, butcher paper, cardstock, and blank.
- Trim out the infusible ink transfer sheet liner close to your infusible ink design.
- To prevent shifting during the transfer process, secure the design to blank with a Heat resistant Tape.
- You can use the Heat Resistant Tape to secure the infusible ink pen and marker designs as well.
Step 6: Apply Heat Over The Design
- Start the separate timer and move your Cricut EasyPress Mini all over your design continuously till the countdown reaches zero. Cover all the areas of your infusible ink design, including the edges and the center.
- Let the heat plate of your Mini press extend approximately 0.5 inches beyond all the edges of the design.
Step 7: Remove And Reveal
- Gently remove the butcher paper, tape, and design once everything cools down.

 Cricut EasyPress Tote