3 Fun Activities With Cricut Joy & Maker
- Posted by:Mathew Jones
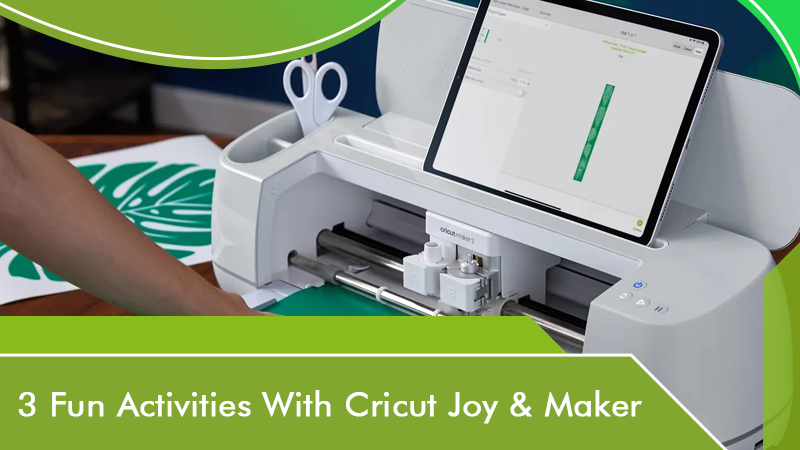
Want to do some fun activities with Cricut Joy Maker? You're in the right place! This small but powerful machine is about to allow you to quickly and easily customize anything with one cut and one color in 15 minutes or less. And the best part? Since this new Cricut Joy maker is small in size but mighty in its capabilities, we will share how easy it is for you and your child to manipulate it today!

In this post, we will be going over the ins and outs of this new cutting machine, as well as sharing 3 fun and simple activities parents can help children with straight out of the box. This machine will be a dream come true not only for parents to have in their house but also for their aspiring little crafters.
So, keep scrolling to check out three different activities you can create with Cricut Joy maker at home.
Activity 1: A Simple Handmade Card with Cricut Joy Maker
You can easily personalize last-minute cards for any event using pre-made pieces and your Cricut Joy maker. Also, you can mix and match the colors of your cards and inserts for amazing one-of-a-kind designs that come out of paper! These cards will surely tempt the lucky recipients, and they only take you minutes to make.

What supplies you will need:
- Cricut Design Space
- Cricut Joy Maker
- Cricut Joy Insert Cards
- Cricket Joy Card Mat
- Cricut Joy Blade and Housing
Follow these steps to make a simple handmade card at home given below:
- First, select the card design you want to make. You will find "Cricut Joy Insert Cards" on the Cricut Project page. Scroll through the different options and choose your favorite. The design we selected was "You're the Best Card."
- Next, read the instructions and then choose "Make It."
- After that, select "On Card Mat" and choose Continue.
- Then, browse through all the materials and select "Insert Card - Cardstock."
- Once you have card materials on the mat, insert the mat into your machine and hit cut.
- When the cut is done, remove that mat from your machine. Now carefully peel the mat away from the card to show the design.
- Lastly, hold the coordinating card insert and tuck it into the corner cuts of the card, one by one, until all the corners are aligned and the insert lies flat inside the card.
- This much only! Now enjoy your amazing new handmade card!
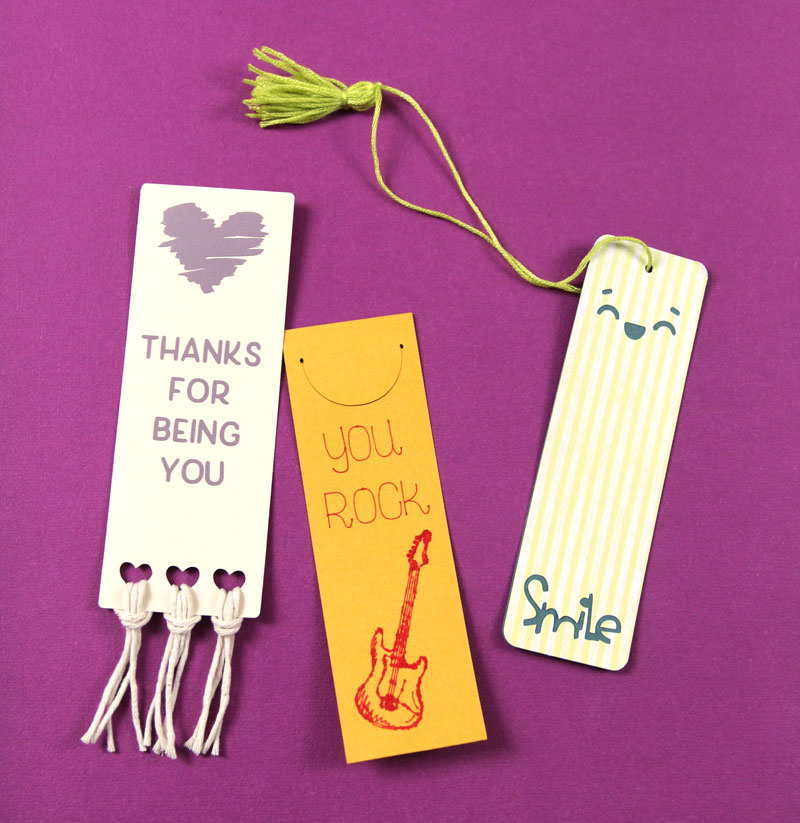
Activity 2: DIY Paper Bookmark with Cricut Joy Maker
Using the Cricut Joy Pen in the machine, you can design your own coloring page paper bookmarks in minutes! It would be great for parents to make with kids so they can pass it on to their family members, friends, and teachers. You can also use this idea as a quick gift for birthday parties, in the classroom, for the holidays - whenever.
Supplies you will need:
- Cricut Design Space
- Cricut Joy Maker
- Cricut Joy Pen {available in black color}
- Cricut Paper Trimmer
- White Cardstock
- LightGrip Cricut Joy Mat
- Optional - single hole paper punch, scissors, and craft yarn
To create a DIY paper bookmark with Cricut Joy Maker, follow these steps given below:
- First, you must search for "Bookmark" designs in the Cricut Design Spaces. We chose the "Place We Go Bookmark."
- Next, take your paper trimmer and white cardstock.
- After that, trim your cardstock so that it fits over your mat.
- Then, go ahead and secure it in place on the mat.
- Now, you have to hit "Make It" on the Cricut Design Space and follow the instructions to insert a Cricut pen or marker into the machine.
- When the machine is finished drawing, you have to replace your marker for the cutting blade.
- Next, follow the instructions to cut the bookmark shape out of cardstock.
- When your machine is done cutting, remove the mat from your machine.
- Lastly, carefully peel off the mat from the prepared bookmark.
- Now you can either use a gift or enjoy it or punch a hole in the top of the bookmark, to add a string for extra flair. The choice is up to you!
Activity 3: Smiling Vase with Cricut Joy Maker
This activity is something that adults can do with the children, to gift someone special on Mother's Day, teacher appreciation, or as a nice surprise left by you on someone's door. All it takes is a little permanent vinyl and a flat surface vase to make it.

What supplies you will need:
- Cricut Design Space
- Cricut Joy Maker
- Weeder
- Scraper
- Smart Vinyl {any color you like to use, we used permanent black color}
- Cricut Joy Transfer Tape
- Small Planter
Follow these instructions to make a smiling design vase with Cricut Joy Maker given below:
- First, in the Cricut Design Space, you must enter and search "planter face." We selected "Cute Planter Face Sticker," which should be the first project you see in the lineup.
- Next, you have to hit "make it" on the Cricut Design Space and follow the steps to cut the pictures out of vinyl {Because we're using Smart Vinyl, there's no need for matting. Simply load the vinyl sheet into your machine, and it will know what to do.}
- When your machine cutting is finished, you must use your weeder tool to remove unnecessary pieces of vinyl.
- Now, use transfer tape and scraper to apply the smiling vinyl design to your vase.
- And all! You are ready to gift it!
So, this is where we end this post. Simply put - the new Cricut Joy maker is fun, functional, and easy to use.
Just think of all those handmade cards, gifts, or little pieces of home decor you can create. Or those vinyl shirts with quirks so your kid can stand out from the crowd. Not to mention all those scrapbooking pages you can start and end up hitting off your to-do list. You are going to be able to tackle so many practical, everyday projects that have never been more accessible or easier!